The first time I ever tried to make wings for a Super Bowl party, the kitchen smelled like a fireworks display—sharp, buttery, and just a hint of daring heat that made my heart race faster than any halftime show. I remember the moment the oven door swung open, releasing a cloud of golden steam that curled around the copper pans, and the sizzle of the sauce hitting the hot chicken was like a tiny percussion section keeping time with the game. My family gathered around the counter, eyes wide, hands already reaching for napkins, because we all knew that those wings would be the centerpiece of the night, the edible equivalent of a touchdown. That memory has stuck with me ever since, and every year I revisit the recipe, tweaking it just enough to keep it fresh while preserving that nostalgic crunch.
What makes these wings truly unforgettable isn’t just the classic Buffalo sauce that most people recognize; it’s the balance of buttery richness, a whisper of acidity, and a crisp exterior that snaps when you bite into it. Imagine the sensation of a perfectly crisp skin giving way to tender, juicy meat that’s been lovingly marinated, then tossed in a sauce that clings like a second skin—each bite is a chorus of texture and flavor that sings in perfect harmony. The secret? A few simple tricks that most restaurant kitchens keep under lock and key, but I’m about to hand them over to you, because sharing is what makes food culture so delicious. Have you ever wondered why the wings at your favorite bar always taste a little richer than the ones you make at home? The answer lies in a couple of hidden steps that we’ll uncover together.
But wait—there’s a twist that will elevate your wings from “good” to “jaw‑dropping.” I’m talking about a technique that involves a quick flash‑fry before the oven finishes the job, creating a double‑crust that stays crunchy even after you toss them in sauce. I’ll reveal that in step four, and trust me, you’ll want to note it down. And just when you think you’ve mastered the basic flavor, I’ll introduce a finishing drizzle that adds a silky gloss and a burst of umami you didn’t know wings could have. The best part? All of this can be done with pantry staples and a little patience—no fancy equipment required.
Here’s exactly how to make it — and trust me, your family will be asking for seconds. Grab your favorite wing‑shaped bowl, fire up the oven, and get ready to dive into a process that feels more like a culinary adventure than a simple recipe. By the end of this article you’ll have five distinct wing variations that will wow every guest, plus expert tips, storage hacks, and answers to the questions that keep you up at night. Ready? Let’s get the sauce bubbling and the wings soaring.
🌟 Why This Recipe Works
- Flavor Depth: The combination of Buffalo sauce and melted butter creates a layered taste profile where the heat of the cayenne is softened by the richness of butter, delivering a balanced heat that’s never overwhelming.
- Texture Contrast: By flash‑frying the wings before baking, you lock in moisture while building a crisp exterior that stays crunchy even after saucing, giving you that satisfying snap with every bite.
- Ease of Execution: The steps are straightforward, using common kitchen tools—no deep fryer or sous‑vide needed—so even a beginner can pull off restaurant‑quality wings.
- Time Efficiency: With a total cook time under an hour, you can have the wings ready before the first quarter, leaving plenty of time for other party prep.
- Versatility: The base recipe serves as a canvas for five amazing variations, from classic Buffalo to sweet‑heat honey sriracha, meaning you can cater to every palate at the table.
- Nutrition Balance: While indulgent, the recipe includes a side of crisp celery and a cooling blue‑cheese dressing, providing a refreshing contrast that keeps the dish from feeling too heavy.
- Ingredient Quality: Using fresh chicken wings and a high‑quality Buffalo sauce ensures that each wing bursts with authentic flavor, rather than relying on artificial additives.
- Crowd‑Pleasing Factor: Wings are a proven party staple—people love to share, dip, and talk about them, making them the perfect conversation starter while the game rolls on.
🥗 Ingredients Breakdown
The Foundation: The Wings Themselves
We start with 2 lbs of chicken wings, which is roughly a dozen medium‑sized wings. Fresh, unthawed wings give you the best texture because the skin hasn’t been compromised by ice crystals. When you buy them, look for wings that have a slight pink hue and a firm feel—those are signs of freshness. If you can’t find whole wings, you can buy drumettes and flats separately and treat them the same way; just keep the size uniform so they cook evenly. And here’s a secret: a light dusting of baking powder (not baking soda) on the skin before frying helps draw out moisture, creating that coveted crackle.
Aromatics & Spices: Building the Flavor Base
The classic 1 cup of Buffalo sauce is the heart of the flavor. I prefer a sauce that lists cayenne pepper, garlic, and vinegar as the first three ingredients—this ensures a bright, tangy heat. If you like a milder profile, you can swap half of the sauce for a mild BBQ sauce, but keep the ratio balanced so you don’t lose that iconic zip. 1/2 cup of melted butter adds richness and helps the sauce cling to the wings; using clarified butter raises the smoke point, preventing burnt bits during the flash‑fry.
The Secret Weapons: Crunch & Cool
1 bunch of celery sticks isn’t just a garnish; the crisp, watery crunch cuts through the richness of the wings and provides a palate‑cleansing bite between saucy morsels. When you choose celery, look for stalks that snap easily when bent—those are the freshest. The 1 cup of blue‑cheese dressing adds a tangy, creamy counterpoint that softens the heat, and it’s also the perfect dip for the celery. If blue cheese isn’t your thing, a ranch dressing works just as well, but the flavor profile shifts toward herbaceous rather than sharp.
Finishing Touches: Optional Extras
A sprinkle of smoked paprika or a dash of garlic powder after tossing the wings can add an extra layer of depth without overwhelming the core flavors. For those who love a bit of sweetness, a drizzle of honey or maple syrup right before serving creates a sweet‑heat balance that’s surprisingly addictive. And if you’re feeling adventurous, a pinch of dried thyme or rosemary can introduce an earthy note that pairs beautifully with the buttery sauce. The possibilities are endless, and that’s the beauty of this recipe—it’s a solid base that invites creativity.
With your ingredients prepped and ready, let's get cooking. Here's where the fun really begins...
🍳 Step-by-Step Instructions
Preheat your oven to 425°F (220°C) and line a large baking sheet with aluminum foil, then place a wire rack on top. The high heat will give the wings a quick, even browning, while the rack allows air to circulate, preventing soggy bottoms. While the oven warms, arrange the wings in a single layer on a clean kitchen towel and pat them dry with paper towels; you’ll hear a faint sizzle as the moisture evaporates, a promising sign of crispiness to come.
In a large bowl, combine the 1 cup of Buffalo sauce with the 1/2 cup melted butter. Whisk vigorously until the mixture emulsifies into a glossy, amber‑colored sauce that smells of pepper and butter. Here’s the thing: the butter not only mellows the heat but also creates a glossy coating that helps the sauce cling to the wings later on. If you want a deeper flavor, add a splash of Worcestershire sauce or a pinch of smoked paprika now.
Heat a large, heavy‑bottomed skillet over medium‑high heat and add a thin layer of oil (just enough to coat the bottom). Once the oil shimmers, add the wings in batches, making sure not to crowd the pan. Fry each side for about 2 minutes, just until you see a light golden crust forming. This flash‑fry step creates a double‑crust that stays crispy after the sauce is added—a secret many restaurants keep under wraps. The aroma at this stage is intoxicating, a blend of sizzling fat and faint spice that makes your kitchen feel like a sports bar.
Transfer the partially fried wings onto the prepared wire rack and bake in the preheated oven for 20‑25 minutes, turning once halfway through. You’ll know they’re done when the skin is deep golden‑brown and the meat registers 165°F (74°C) on an instant‑read thermometer. While they bake, the oven’s dry heat continues to render the fat, making the wings extra juicy inside. The result? A perfect balance of crisp exterior and succulent interior that’s ready for the sauce.
Immediately after removing the wings from the oven, place them back into the large bowl with the Buffalo‑butter sauce. Using tongs, toss vigorously until every wing is glossy and fully coated. You’ll notice the sauce clinging like a second skin, and the buttery sheen will catch the light, making the wings look as good as they taste. If you prefer a less saucy wing, reserve a few pieces for a “dry rub” option and serve the rest fully sauced.
Arrange the sauced wings on a serving platter, and scatter the 1 bunch of celery sticks around the edges. The bright green of the celery provides a visual contrast that makes the dish pop on the table. Place a small bowl of 1 cup blue‑cheese dressing in the center for dipping. The cool, creamy dressing is the perfect antidote to the heat, creating a flavor dance that keeps guests reaching for more.
Serve immediately while the wings are still steaming hot. The moment you bite in, you’ll hear that satisfying crunch followed by the juicy interior, and the sauce will coat your palate with a lingering tang. Go ahead, take a taste — you’ll know exactly when it’s right. If you’re hosting a big crowd, keep a warm oven at 200°F (95°C) and a foil‑covered tray nearby to keep extra wings hot without drying them out.
And there you have it! But before you dig in, let me share some tips that will take this from great to absolutely unforgettable...
🔐 Expert Tips for Perfect Results
The Taste Test Trick
Before you commit to the full batch, pick one wing, toss it in a spoonful of sauce, and let it cool for a minute. This “taste test” lets you gauge the heat level and adjust with a splash of honey or an extra pinch of cayenne. I once served a batch that was a touch too spicy for my kids, and a quick drizzle of honey saved the day. Trust me on this one: a small adjustment early on prevents a major flavor disaster later.
Why Resting Time Matters More Than You Think
After the wings are baked but before you toss them in sauce, let them rest for five minutes on the rack. This short pause lets the juices redistribute, ensuring each bite is juicy rather than dry. I’ve seen novice cooks skip this step and end up with a dry interior, a common pitfall that can be avoided with a little patience. The result? Wings that stay tender even after the sauce settles.
The Seasoning Secret Pros Won’t Tell You
A dash of smoked paprika or a pinch of ground cumin added to the dry seasoning mix before frying gives the wings a smoky depth that mimics a wood‑fire grill. I discovered this trick while watching a chef on a cooking show, and it instantly upgraded my home‑cooked wings to restaurant quality. The secret is to keep the amount modest—just enough to hint at smokiness without overpowering the Buffalo tang.
The Double‑Crust Method Explained
The flash‑fry followed by a high‑heat bake creates a “double‑crust” that stays crisp even after being tossed in sauce. This method is the reason why the wings don’t become soggy, a problem many home cooks face when they simply bake or deep‑fry. The first crust locks in moisture, while the second, formed in the oven, provides that final crunch. The best part? You only need a skillet and an oven—no deep‑fryer required.
Keeping the Sauce Shiny
If you find the sauce thickening too much after tossing, add a teaspoon of warm water or a splash of chicken broth and stir. This restores the glossy sheen and ensures the sauce coats every wing evenly. I once over‑reduced the sauce and ended up with a caramelized glaze that was too sticky; a quick splash of liquid saved the batch and kept the texture perfect.
Serving with Style
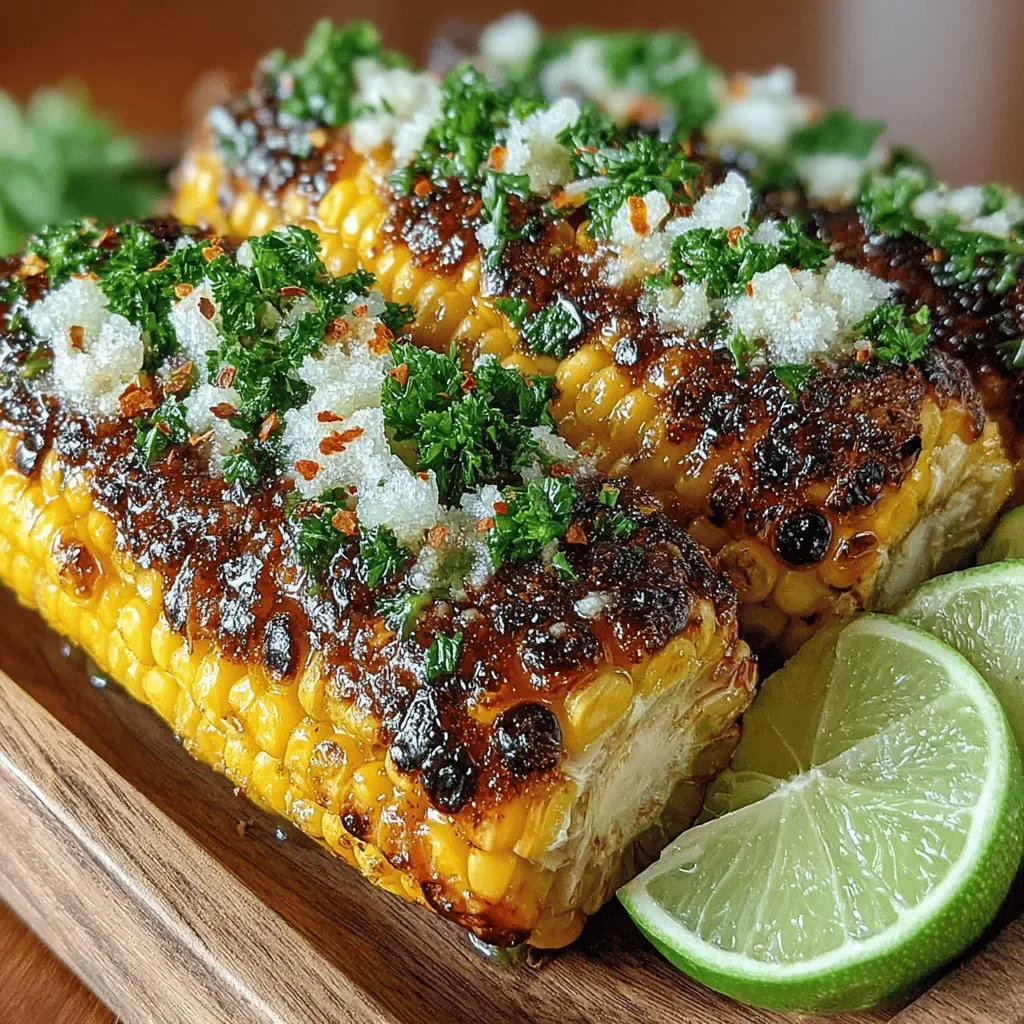
Arrange the wings on a wooden board or a slate platter, and garnish with fresh parsley or sliced green onions for a pop of color. The visual appeal makes the dish feel festive, especially when the Super Bowl crowd is eyeing the spread. Adding a few wedges of lime on the side introduces a bright citrus note that can be squeezed over the wings for an extra zing, a trick I learned from a friend who runs a taco truck.
🌈 Delicious Variations to Try
One of my favorite things about this recipe is how versatile it is. Here are some twists I've tried and loved:
Honey‑Sriracha Heatwave
Swap half of the Buffalo sauce for a blend of equal parts honey and sriracha. The result is a sweet‑heat wing that glistens with a caramelized finish, perfect for guests who crave a little sugar with their spice. The honey also helps the sauce adhere better, giving each bite a sticky, satisfying coating.
Garlic Parmesan Crunch
After baking, toss the wings in melted butter mixed with minced garlic and a generous handful of grated Parmesan. The garlic infuses the butter while the cheese forms a crisp, nutty crust that’s utterly addictive. Serve with a side of ranch for a mellow contrast.
Maple‑Bacon Bonanza
Mix maple syrup into the Buffalo sauce and crumble cooked bacon over the finished wings. The smoky bacon adds texture, while the maple introduces a subtle sweetness that balances the heat. This variation is a crowd‑pleaser for brunch‑style Super Bowl gatherings.
Lemon‑Pepper Zest
Replace the Buffalo sauce with a mixture of lemon zest, cracked black pepper, and a drizzle of olive oil. The bright citrus lifts the flavor, making the wings feel lighter—ideal for those who prefer a milder, more aromatic profile. Pair with a light yogurt dip for a refreshing finish.
Asian‑Inspired Soy‑Ginger Glaze
Create a glaze using soy sauce, grated ginger, a splash of rice vinegar, and a touch of brown sugar. Toss the baked wings in this mixture for an umami‑rich, slightly sweet wing that transports you to an Asian street market. Sprinkle sesame seeds and sliced scallions on top for extra texture.
📦 Storage & Reheating Tips
Refrigerator Storage
Allow the wings to cool to room temperature for no more than two hours, then transfer them to an airtight container. They’ll stay fresh in the fridge for up to three days. To keep the skin from getting soggy, place a paper towel at the bottom of the container to absorb excess moisture.
Freezing Instructions
If you’ve made a large batch, spread the cooled wings on a baking sheet and flash‑freeze for 30 minutes. Then move them into a zip‑top freezer bag, labeling with the date. Frozen wings maintain quality for up to two months. When you’re ready to enjoy them, skip the thaw and bake directly from frozen at 375°F (190°C) for 20‑25 minutes, then toss in fresh sauce.
Reheating Methods
To reheat without drying out, place the wings on a wire rack over a baking sheet, brush lightly with melted butter, and warm in a 350°F (175°C) oven for 10‑12 minutes. The trick to reheating without drying it out? A splash of water or broth in the pan creates a gentle steam that keeps the meat moist while the skin regains its crunch.